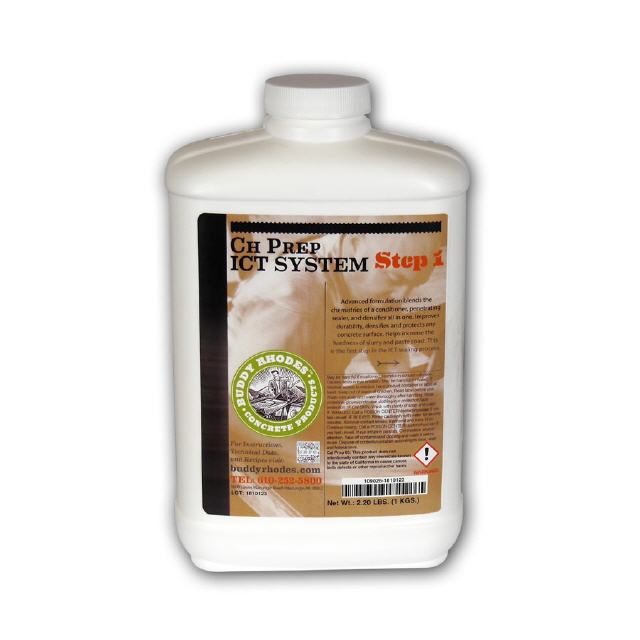
Le système ICT CH Prep + FS Seals est un scellant hybride pour béton, utilisant les avantages de la technologie d'étanchéité pénétrante réactive et d'une technologie de micro-revêtement dans un système en deux parties.
Ce scellant offre une excellente résistance aux taches et à l'abrasion, nécessitant un entretien minimal pour des années d'utilisation et d'abus de qualité.
Les conditions dans lesquelles ce scellant sera utilisé sont aussi variées que le nombre de personnes qui l'utiliseront. Ce guide fournit des informations sur la façon d'appliquer ce scellant, mais nous nous attendons à ce que ce scellant réagisse différemment à toutes les conditions variées auxquelles il sera confronté. Nous recommandons toujours un test à petite échelle pour déterminer l'adéquation
Concrete Surface Preparation
Preparing the concrete surface before sealing is an important first step to ensure success with any sealer. The concrete must meet four conditions before starting with the sealer application:
• It should be used on a quality high performance concrete surface.
• It should be properly cured.
• It should be properly processed.
• It should be clean and dry.
Curing
Standard practice is to allow the concrete to cure for 5-7 days after casting, adhering to good concrete curingpractices. This ensures the cement matrix is maturing and the internal moisture levels have been reduced to low
levels. For some concrete mixes this happens in a few days, for others it will take longer; you will need to set thetime between casting and sealing based on the habits of the concrete you are working with. With Buddy Rhodesmixes, 5 days following casting is a good start, although more time should be given during cooler periods, andmore time is always better if you have time to give. For best results, let your concrete cure for at least 7 days.Summary: For best results, let your concrete cure for at least 7 days.
Processing
The surface of the bare concrete should be processed to a visually matte finish, with a profile, or "tooth," prior to sealing. This ensures the sealer develops a good mechanical bond with the surface. The rougher the surface is,the better the sealer will adhere. Profiling also removes residual material or contaminants that would interferewith forming a good bond. Wax and form release agents routinely transfer to the surface of the concrete duringcasting, and these must be removed before sealing.
There are several ways to profile concrete surfaces. Acid etching, wet polishing or sanding, and dry sanding are three good options, described below.
Acid Etching -Acid etching provides a "tooth" for the sealer and dissolves any weak material in the substrate that may prohibit sealer from fully penetrating and adhering. Etching is most often performed on cream
finishes, or concrete that’s left untouched after it is demolded. Keep in mind acid etching mainly affects the cement paste, and will not change the surface of exposed glass, tile, or exposed stone such as quartz
or granite. Etching may not entirely remove surface residue like wax or form release agents. For that, we recommend light scrubbing with a non-woven abrasive pad. Muriatic acid substitutes are not recommended
with ICT reactive sealers. These types of acids can cause inconsistent reactions with the sealer. After acid etching, rinse well with clean water to remove any acid residue.
Wet Polishing or Sanding- A popular and easy way to lightly work the surface without exposing sand grains is to hand-sand the surface using Buddy Rhodes hand pads. Use a 400-grit hand pad, as coarser grit can
leave scratches and can be too aggressive. The hand pads should always be used wet to prevent scratchingthe concrete surface. Whenever possible use circular motions to minimize linear scratching patterns that may detract from the appearance. They're a great way to remove surface residue and to lightly smooth theconcrete’s surface. A wet-sanded surface can be etched to further enhance the microscopic tooth. Whenpolishing a larger area or to remove material faster and efficiently, a pneumatic or electric polisher could be used.
Dry Sanding - A method of opening the surface of the concrete or smoothing the surface of the concrete withprocessing methods that do not depend on the use of water. These methods may include using the Buddy
Rhodes hand pads dry (but always be careful of harsh scratches that may occur while using them dry) or using mechanical equipment such as orbital sanders or rotary polishers with dry diamonds pads. All tooling should
be attached to vacuum equipment to control any dust that may occur during the surface processing. Using sandpaper dry is really only effective in removing bone paste, and the paper should be changed frequently as
used paper may burnish the surrounding area.
Cleaning & Drying
The concrete surface should be cleaned after it has been profiled, since etching or sanding concrete creates very fine residue that must be removed before sealing. Non-woven abrasive pads can be used to remove the
fine residue. Rinse well with clean water and wipe dry. After cleaning, allow the concrete to fully dry prior to applying sealer. Dry concrete lets the sealer penetrate into the concrete, whereas wet, damp or barely dry
concrete does not. A good rule of thumb is to wait a minimum of 12 hours for the concrete to dry followingtotal saturation. Cooler shop temperatures will slow evaporation, so if the temperature is below 21°C, give the concrete more time to dry out. When in doubt, wait 24 hours
Environment
ICT CH Prep + FS Seals is a Reactive Sealer that benefits from warm concrete conditions. Ideal temperatures forsealer application are between 21°C-35°C. Temperatures below 21 °C will slow down evaporation and
the cure time of the sealer. Temperatures above 35°c will increase the chance of the sealer flashing off too quickly, usually resulting in application marks.
Moisture and humidity also play an important role with the sealer. Because the sealer is diluted with water, it’s important that the moisture from the Priming and Finish applications dry out between applications. The sealer
won’t begin to fully crosslink (cure) until the water that’s in the freshly applied sealer has evaporated. Higher humidity will slow the cure time.
Tools and Materials Required for Sealer Application
• Small Trigger Spray Bottles
• Microfiber Sponges
• Microfiber Cloth
• Clean Water
• Timer
ICT CH Prep + FS Seals Application Stages
Stage 1 requires multiple Primer Applications using CH Prep.
Stage 2 requires multiple Finish Applications using FS Seals.
Stage 3 requires an application of Clean and Set.
Stage 1: CH Prep Primer Applications
First Primer Application Technique - Begin by preparing a mixture of 1 part CH Prep to 1 part Water. Dampen a microfiber sponge with clean water. Pour some of the CH Prep + Water mixture onto the surface of the
concrete. Using the damp microfiber sponge, spread the mixture across the entire surface until it is fully covered with a clear film of sealer. Load the mixture into a spray bottle. Continue to spray and wipe the
mixture onto the surface, maintaining an even, thin film for 10 minutes. Rinse the applicator sponge withclean water. Ensure the sealer does not puddle or dry out. Once dry, allow at least 30 minutes before another
application.
Second Primer Application Technique- Dampen a microfiber sponge with clean water. Lightly spray a thin coat of the CH Prep + Water mixture onto the sponge and the concrete surface. Wipe the mixture over the
concrete surface to achieve a thin, evenly wet film of sealer. Keep the surface wet for 7 minutes. Rinse the applicator sponge with clean water. Once dry, allow at least 30 minutes before another application.
Optional Additional Primer Application Technique: If the second prime application darkened the surface, it may be necessary to continue priming. Apply full strength CH Prep for 1 to 2 applications, keeping the surface wet for about 1 minute. Continuous wiping helps work the sealer into the surface and into any pinholes that may remain. Rinse the applicator sponge with clean water. Once dry, allow at least 30 minutes before another application
Wait at least 2 hours before proceeding with the finish applications. Remember that by priming you are adding water into the concrete. ICT, like many sealers, must dry in order for it to begin cross-linking, which is critical
for achieving the stain and scratch resistance it offers. Moisture in the concrete, and moisture in previous coats of sealer will slow curing, as will cold and damp shops. Good practice is to be patient and wait longer.
Stage 2: FS Seals Finish Applications
Finish Application Technique- Load full strength FS Seals into a spray bottle. Dampen a microfiber sponge with clean water. Lightly spray a thin spray of FS Seals onto the sponge and the concrete surface. Wipe the FS
Seals over the concrete surface to achieve a very thin, evenly wet film of sealer, the thinner the better. Keep the surface wet for 1 minute. Allow the finish application to dry for 30 minutes. Repeat these steps for up to 4
finish applications.
The number of finish applications depends on the stain resistance required for a project. This usually ranges from 1 to no more than 4 applications: 1 application for surfaces that will see average use from expected
staining agents, 4 applications for surfaces that will see high use and exposure (commercial kitchens, for example). Be aware that more than 4 applications builds up layers that slow the overall cure of the sealer
system. This can ultimately lower the performance of the sealer.
Tip- If excess material needs to be removed from the surface, first squeeze out the microfiber sponge, then even out the excess sealer that remains on the concrete. If streaks or application marks are present after the
sealer has dried, the application was too thick and this will need to be sanded to remove before proceeding
Stage 3: Clean and Set Application
Allow freshly applied Primer and Finish Applications to cure for a minimum of 2 hours before proceeding to the Clean and Set Application. Applying Clean and Set activates the early water repellency, hardness, and scratch
resistance of the freshly sealed surfaces.
Clean and Set Wipe Down Surface Technique- Dampen a paper towel with Clean and Set. Evenly wipe thedamp towel over all sealer surfaces. Allow the vapor residue to dry on the surface. After the residue has dried,
use a clean cloth and water to wipe down surfaces, removing any Clean and Set residue.
Important Note-For several weeks after applying the sealer you may notice the concrete darken in the areas where water and things are left on the surface. This is normal as the cross linking of the sealer continues. Darkening of the surface is not an indication that the sealer is not working. In fact it is a normal reaction as the sealer continues to cure. For the first several weeks it is recommended to wipe up all wet spills promptly
Care and Maintenance
• Wipe up spills as they occur.
• Clean regularly with recommended non-abrasive cleaners such as Clorox Kitchen Cleaner or Windex Vinegar Multi-Surface Cleaner
• Soft abrasive cleaning sponges can be used such as Scotch-Brite Non-Scratch Scrub Sponges
• Never used a sealed countertop as a cutting board.
• Always use coasters or felt pads below anything with sharp edges.
• Avoid leaving potted plants or objects that will maintain wet contact in one spot with the counters for extended periods of time.
• Reapplication of sealer is recommend every 5-10 years…no stripping required.
Let us help you find your way.
The list below may help you find what you are looking for via an alternative path.
Ces produits sont classés par application telles que, le moulage du corps humain, le moulage, les tirages, les produits transparents, la restoration, le prototypage, etc...
Nous utilisons des cookies pour optimiser notre site web et vous offrir la meilleure expérience en ligne possible. En cliquant sur "Tout accepter", vous acceptez cela Paramètres avancés